
Outdoor gear shares one characteristic: it sells a promise that nothing goes wrong in an environment you do not control. A tent has to keep out rain and wind, a folding chair has to hold an adult’s weight on grass, and a stove has to stay sealed between an open flame and a pressurised canister. In a warehouse, all three look fine. Problems usually only surface once the tent is actually pitched, the chair is sat on, and the stove is lit.
Demand is still expanding. According to industry report data cited by China.com.cn, China’s outdoor products exports reached USD 2.365 billion in 2025, of which synthetic-fibre tents accounted for 72.68% of export value, with Southeast Asia emerging as an important growth market (source: China.com.cn, October 2026). Customs figures by category tell a similar story: in 2025, synthetic-fibre tent exports exceeded 46 million units and USD 1.7 billion, while other metal-framed seating exceeded 270 million units and USD 3.1 billion.
High volumes, falling unit prices, and buyers demanding more detail than ever — which is exactly why field testing earns its keep. Below, category by category, is what to test on site for tents, folding chairs and stoves, what the defects look like, and how to grade them. These three are also the field tests Inspector Online runs most often in the outdoor category.
1. First, what field testing actually answers: “does it work?”
A standard shipment inspection answers “was it made right?” — whether appearance, workmanship, dimensions and packaging match the approved sample. Outdoor gear needs one more layer: once assembled, does it function? That judgement runs into three unavoidable difficulties.
Difficulty one: many load-bearing structures, and failures are sudden. Poles, chair tubes, welds, rivets, buckles — if material or process is skimped anywhere, none of it is visible from the outside. It only breaks, collapses or loosens under load.
Difficulty two: material performance cannot be judged by feel. The hydrostatic head of a coating, the tear strength of a fabric, the ageing resistance of a seal — all of these need parameters and measurement. The eye cannot tell 1,500 mm from 3,000 mm.
Difficulty three: the consequences of failure are asymmetric. A stiff zipper is a complaint; a collapsing chair is an injury; a leaking stove is a fire. Defect grading cannot follow “does it look good” — it has to follow “can it hurt someone”.
Field testing therefore follows a fixed chain of actions: assemble → load → cycle → re-check. First assemble the unit fully according to the instructions (this step alone filters out a large share of missing or wrong parts and structural interference), then load it to the rated condition, then repeat the actions — opening and closing, sitting down and getting up, igniting — to watch for degradation, and finally re-check assembly accuracy and look for irreversible deformation. Every action needs photos or video, or there is no way to review it afterwards.
2. Tents: pitching, waterproofing and wind resistance
2.1 Pitching test: can it stand up without a fight?
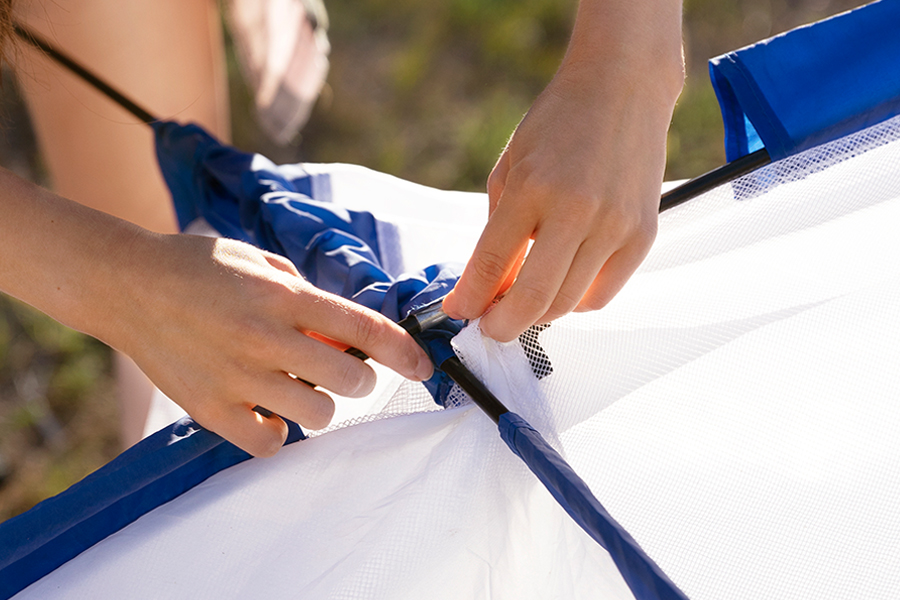
The sampled unit must be fully pitched and packed away at least three times, recording the time for each attempt and where it catches. Watch four points: whether resistance is even when threading poles through the sleeves (local tightness means the sleeve or pole diameter is out of tolerance); whether pole joints insert to full depth; whether clips and pins seat in one motion without slipping; and whether shock-cord tension is consistent, since slack cords let poles misalign and crack. If inner-tent attachment points and flysheet grommets show systematic deviation above 5 mm, the whole batch will sit crooked — record it as a major defect.
2.2 Structural parts: callipers beat eyes
Aluminium poles (commonly 7001-T6 or 7075) need outer diameter and wall thickness measured and compared line by line against the specification. On fibreglass poles, look for longitudinal cracks and burrs — fibreglass almost always fails starting from a hairline crack. Also check anodising for evenness, riveted joints for looseness, and whether pole ends are capped. The webbing loops at the four base corners are the easiest place to cut corners: confirm webbing width, stitch rows and reinforcement patches against the approved sample.
2.3 Fabric, coating and stitching: backlighting is the most effective check
Hold the flysheet against strong light or daylight — pinholes, missed coating and bubbled seam tape become obvious. Check stitch density per 3 cm and look for skipped stitches, loose threads and breaks; on taped seams, check that the tape covers both sides of the stitch line and that the edges are pressed down rather than lifting. Cycle the zipper 20 times to confirm smoothness, aligned double sliders and an effective anti-snag flap. Waterproofing is accepted against the hydrostatic head agreed in the order; on site, a simple water pour shows how coating and tape behave in practice, with the focus staying on coating uniformity and how firmly the tape is pressed.
2.4 Fixing system and capacity claims
Count pegs, guy lines and tensioners against the packing list — shortages are very common — and check that guy-line reinforcement patches are properly stitched and the lines pre-fitted. For dimensions, measure the footprint, the centre height of the inner tent and the porch depth, then cross-check them against packaging claims, the instruction sheet and capacity wording such as “3–4 person”. A stated capacity that does not match the actual inner-tent size is one of the most frequent causes of cross-border returns. On wind resistance, focus on how the seams deform at guy-line attachment points under tension and how well the pegs hold; if seams stretch or reinforcement patches wrinkle where the load concentrates, the design margin is too thin.
| Common defect | What it looks like on site | Grade |
|---|---|---|
| Coating delamination, lifting seam tape | Bubbles visible in backlight, edges lifting, will not press back down | Major |
| Pinhole leakage, skipped stitches | Rows of bright points under strong light, stitch density below spec | Major |
| Pole burrs and cracks | Sleeves scratched when threading, longitudinal cracks on fibreglass | Major |
| Stiff zipper, slider off track | Jamming or derailment within 20 cycles | Major |
| Missing accessories (pegs, guy lines) | Count differs from the packing list, pitching compromised | Major |
| Colour variation, print offset, loose threads | Colour difference visible between cartons in the same batch | Minor |
Grading follows Inspector Online’s general criteria; the AQL and defect classification agreed in the order take precedence.
3. Folding chairs: load capacity is measured, not printed
3.1 Tubes and welds: it starts with 0.1 mm of wall thickness
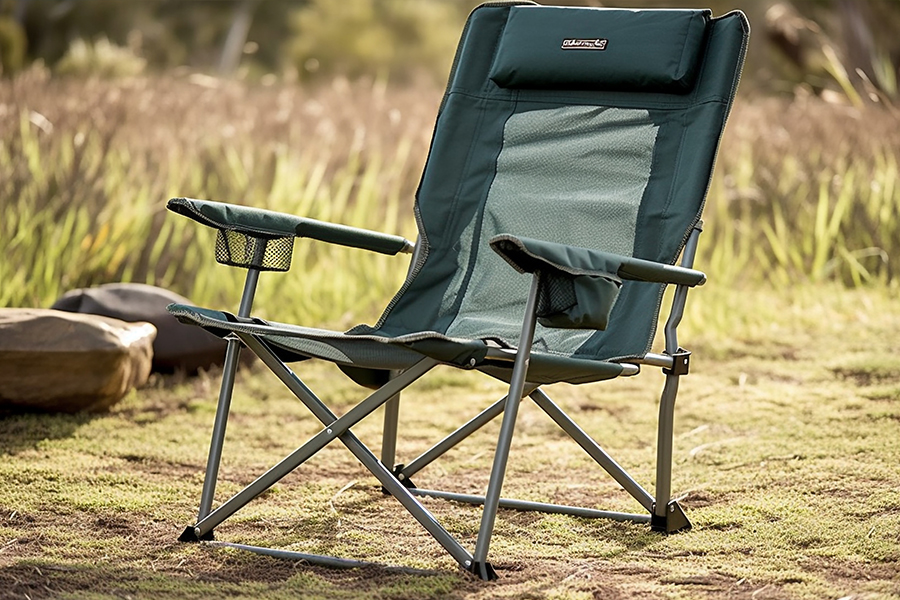
Much of the cost difference in metal-framed seating hides in the tube wall. Measure at both ends and the middle of each tube and compare against the specification; at the same time check that welds are full, with no burn-through or cold joints (tap and listen, or inspect with a loupe), that rivets are tight and not off-centre, and that tube ends are capped — uncapped tube ends both cut hands and collect water and rust. On surface finish, check whether the coating covers weld roots and whether there is exposed metal or sagging.
3.2 Load testing: static hold plus dynamic sit-down
Common practice is to prepare weights at 1.2–1.5× the rated load, spread them evenly over the seat and leave them for 30–60 minutes while watching welds, rivets, tube bending and seat sag. Then have the inspector apply a normal sit-down motion 50–100 times to simulate real-world impact. Re-check after both: any permanent tube bending (judged by holding a straight edge against the tube), cracks at welds, obvious seat sagging, and whether the folding mechanism still opens and closes smoothly. If a product rated 150 kg shows visible deformation after a 120 kg hold, that is not a “minor” issue.
3.3 Fabric and stitching: the load concentrates at four corners
Check the Oxford cloth specification (600D, 900D) and weight against the approved sample, and look especially at how the seat corners and load-bearing webbing connect: double-stitched, bar-tacked, and with the webbing taking load through the frame rather than over it. Pull along the seam by hand — if the stitching opens or the fabric tears first, strength is insufficient. Colour fastness can be screened with a damp white cloth rubbed back and forth; obvious transfer is recorded as an appearance defect.
3.4 Opening, locking and stability
Cycle the chair 10 times: the sleeve should slide smoothly, the lock should spring back audibly into place, and the folded chair should not open by itself. For stability, check whether all four feet touch the ground at once — a height difference above 3 mm between legs means it wobbles, which is a major defect affecting use. Check foot caps for material and how firmly they are fitted; TPR or PP caps that pull off by hand will fall off in transit. Lateral stability can be judged by pushing against one side and watching the tipping tendency, while confirming all four feet are on the ground.
| Common defect | What it looks like on site | Grade |
|---|---|---|
| Cracks or cold joints at welds | Cracks appear after load hold, dull sound when tapped | Critical |
| Insufficient load capacity, permanent tube bending | Deforms at rated load, gap visible with a straight edge | Critical |
| Seat seams bursting, webbing pulling out | Seams split at the four corners under load, webbing slips out of the frame | Major |
| Binding when folding, lock failure | Jams or lock fails to return within 10 cycles | Major |
| Uneven feet, wobble when placed | More than 3 mm height difference between legs, wobbles unloaded | Major |
| Tube-end burrs, foot caps falling off | Sharp to the hand, caps pull off by hand | Major |
4. Camping stoves: leak testing comes first
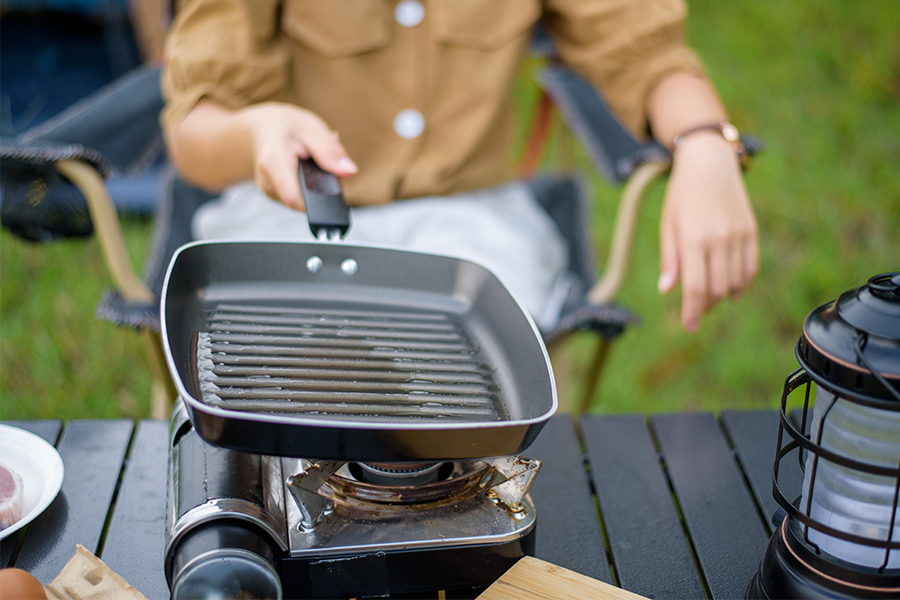
The inspection sequence for stoves cannot start with appearance. Canister on, leak test, ignition, observation, depressurise, canister off — if any step shows a leak, everything after it stops until that issue is handled on its own. Field testing must take place in a well-ventilated area away from ignition sources, with fire extinguishing equipment on hand.
4.1 Airtightness: soapy water is the most direct method
With the canister fitted, apply soapy water to the valve connection, the O-ring, the hose joint and the spindle of the control knob, then watch for at least 30 seconds for bubbles; a portable leak detector can support the check. Inspect the O-ring for deformation, nicks and correct seating, and the hose for kinks and ageing or whitening. For threaded connections, confirm thread accuracy and the number of turns; for bayonet fittings, confirm the locking feel. Persistent bubbles anywhere mean a critical defect — “just tighten it a bit more” is not an acceptable resolution.
4.2 Ignition and flame pattern
Ignite 10 times in a row, recording the success rate and how many actions each attempt takes; for piezo-ignition models, test at different angles so a unit that lights when flat but not when tilted does not slip through. Watch the flame: a steady blue flame is normal, a yellow flame points to an abnormal air-fuel mix, and lift-off, flashback and flicker all trace back to nozzle or mixing-tube accuracy. Sweep the output from minimum to maximum and back, confirming linear control with no binding and no flame-out.
4.3 Pot support stability and heat resistance
Place a pot filled with water on the supports — a typical capacity for the product’s positioning — and watch whether the supports sag, whether the pot slides and whether the unit tilts. After 15–20 minutes of continuous burning, check whether the supports have deformed, whether the windshield has discoloured or blistered, whether the knob has become too hot to operate, and whether the body coating has bubbled. Temperature rise that affects safe operation is one of the easiest things to spot on site — and one of the easiest to overlook.
The pass criteria for stoves can be summed up in six words: no leak, no flame-out, no tip-over. Gas path sealed, flame steady, pot support stable. Only when all three hold does the batch pass the functional gate.
5. Into the process: testing is the last step, but must not be an afterthought
Inspector Online runs a standard seven-step process for outdoor products, and each step has clear landing points for these three categories:
① Sampling. Sample size follows lot size and inspection level, commonly general inspection level II with critical 0 / major 2.5 / minor 4.0. For outdoor gear, set a separate targeted sample for load-bearing and airtight components.
② Shipping-mark check. Carton marks, barcodes and carton dimensions against the order. Tents and folding chairs are bulky light cargo, so carton size error hits freight and warehousing directly — measure the outer carton and its weight.
③ Packaging check. Rigid accessories such as poles and pegs must be separated so they cannot puncture the fabric; for stoves, confirm the canisters are not shipped with the goods and that protective material and warning labels are inside the pack.
④ Style comparison. Colour, structure and accessory combination checked item by item against the approved sample, with particular attention to “quietly swapped materials and parts”.
⑤ Appearance and workmanship. Stitching, welding, coating, printing and assembly accuracy, item by item.
⑥ Dimensions. Footprint, tube diameter and wall thickness, fabric specification, net weight and carton size, against the spec sheet and labelling.
⑦ Field testing. Assemble, load, cycle, re-check — everything in sections 2 to 4 happens here, and the test records (photos, video, data) go out with the report.
Worth stressing: putting testing at step seven does not mean testing requirements can be raised last. What really decides inspection efficiency is writing “what to test, how to test, and what counts as a failure” into the order and the inspection checklist at the point of purchase. Otherwise the site inevitably gets stuck in a loop of “does this count as a problem?”
6. Five practical rules to make field testing actually solve problems
1. Sealed samples should be testable, not just viewable. Beyond appearance, the approved sample should come with a short test record: pole specification and wall thickness, fabric weight and coating type, rated chair load with the load-hold result, and stove ignition and leak-test results. The sample itself speaks — but only data can be reproduced.
2. Turn vague requirements into measurable ones. “Sturdy” cannot be judged; “rated 150 kg, 1.2× load held for 30 minutes with no permanent deformation” can. List 8–12 key measurable items for each category and treat the rest as routine.
3. Slot testing by risk, not only at the end. Structural defects in tents and folding chairs are hard to rework once formed in bulk, so plan a pre-production sample check, in-line inspection and final random inspection. Stoves involve airtightness and combustion, where in-line inspection is worth more than final inspection — batch variation in moulds, seals and nozzles has to be caught during production.
4. Test records must be reviewable. Photograph before and after at the same test position, record short video of load testing, and write actual measured values for dimensions and wall thickness rather than “conforms”. In a dispute, these are the only evidence you can produce.
5. Sample across cartons, and do not let “the sample passed” hide batch-to-batch variation. One order is often supplied from several lines or subcontractors, so spread sampling across carton numbers and compare batch colour, pole length differences, weld appearance and coating thickness. Batch variation triggers whole-lot returns more often than single-unit defects — and is harder to see in a sampling report.
7. Conclusion
The value of outdoor products inspection is ultimately judged at the point of use: a night of rain, one sit-down, one pot of boiling water. Whether assembly goes smoothly, whether the load capacity holds, whether the gas path is sealed — testing those three in the factory costs far less than a return, a claim or a delisting overseas.
For buyers, writing field testing into the inspection checklist means replacing “trusting the factory” with “verifying the factory”. For factories, one strict field test often costs less than ten rounds of rework. That is the position Inspector Online sets for itself in the outdoor category — not replacing standards, not replacing certification, but stopping the measurable part of the risk before the goods leave the factory.
INSPECTOR ONLINE
Tents, folding chairs and stoves — tested item by item before shipping
3,000+ inspectors covering the main manufacturing belts in Zhejiang, Guangdong, Jiangsu and Fujian, supporting pre-production sample checks, in-line inspection, final random inspection and container loading supervision. English reports issued within 24 hours, from USD 103 per man-day.
FAQ
The tent is rated 3,000 mm waterproof. Can that be verified on site?
On site you get consistency, not a number: check that the flysheet coating is even, that seam tape is complete and properly pressed, that there are no rows of pinholes in backlight, and use a simple water pour to see where leaks appear. The hydrostatic head itself depends on the fabric and coating formulation — but whether one batch is consistent can absolutely be seen on site.
The folding chair is rated 150 kg. How is that tested during inspection?
Common practice is weights at 1.2–1.5× the rated load held statically for 30–60 minutes, followed by 50–100 simulated sit-downs, then a check of welds, rivets, permanent tube deformation and seat sagging. The exact multiplier and duration follow the order agreement.
Which test should come first on a stove?
The leak test. Fit the canister, apply soapy water to the valve connection, seals and hose joint, and watch for persistent bubbles before moving on to ignition, flame pattern and pot support stability. Invert the order and the later checks mean nothing.
How many pieces are sampled for outdoor products?
Sample size follows lot size and inspection level, commonly general inspection level II with critical 0 / major 2.5 / minor 4.0. For structural load-bearing parts and airtight components, a separate targeted sample is advisable so they are not diluted by routine sampling.
Is final random inspection on its own enough?
It depends on the product. Structural defects in tents and folding chairs are expensive to rework once formed in bulk, so add a pre-production sample check and in-line inspection. Stove seals and nozzles vary a lot batch to batch, where in-line inspection usually catches problems that final inspection misses. For large orders, container loading supervision is worth adding.