
A shipment sails for more than forty days, and when you finally open the container at the destination port, you find the wrong colors, products that don’t work, short quantities — or cartons that were crushed somewhere along the way. The goods are already overseas, the return freight would cost more than the cargo itself, your customer is pushing for compensation, and your platform account may even face penalties. For a buyer, this is the most passive and most expensive position to be in.
No supply chain, no region, no factory is immune to deviations — problems can rarely be eliminated 100%. What actually separates smooth importers from the rest is where a problem gets caught, and whether there’s evidence in hand when it does. This guide covers two things: first, how to limit damage, file claims, and secure evidence when problems surface only after arrival; second, how to move inspection earlier in the process so that “discovered at port” — the most costly scenario of all — rarely happens to you.
Part 1: Problems Found at the Port — A Four-Step Emergency Response
The first 72 hours after discovery are the most critical. The earlier and more completely you secure evidence, the stronger your position — whether in negotiation or arbitration.
Step 1: Stop unpacking immediately. Preserve the scene.
Don’t rush to unpack or sort everything. Keep the site as it is and take timestamped photos and videos with your phone or camera of:
- The container seal number and the door-opening process
- Shipping marks, stacking condition, and any signs of moisture, damage, or crushing
- Inner packaging and close-up shots of product defects (same style, multiple angles)
- The quantity counting process (recorded box by box)
For transit-related damage, notify the carrier or warehouse on the spot — at pickup or at unpacking — and request a written damage report or exception receipt. Many insurance and carrier claims carry strict deadlines (commonly written notice within 3–15 days). Miss the window and you forfeit the right to claim.
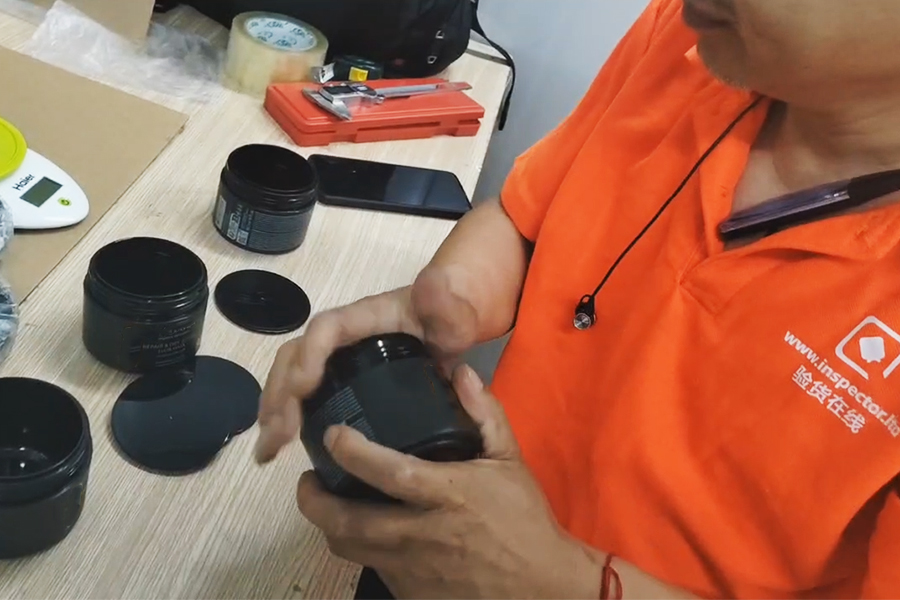
Step 2: Classify the problem and identify where liability most likely lies
Different problems point to different parties. Use this table to assess where responsibility most likely sits:
| Port Problem | Typical Signs | Likely Liable Party | Key Evidence |
|---|---|---|---|
| Product quality defects | Functional failure, poor workmanship, substandard materials | Supplier / factory | Pre-shipment inspection report, sealed samples, contract specification |
| Goods not as agreed | Style, color, size, or configuration differs from the contract | Supplier / factory | Sealed (approved) samples, specification sheets, packing documents |
| Quantity shortage / short shipment | Received quantity below contract or invoice | Factory short-shipping, loading errors, or the carrier | Packing list, loading supervision records, bill of lading |
| Transit damage | Deformation, breakage, moisture, water ingress | Carrier / cargo insurance (when packaging is compliant); the factory if packaging was not | Damage records, port photos, packaging specification, insurance policy |
| Packaging / marking errors | Wrong marks, incorrect barcodes, missing labels | Supplier / factory | Inspection report, packaging specification, port photos |
One point that’s easy to confuse: take a “crushed carton.” If it was caused by vessel movement or cargo handling in transit, pursue the carrier and the insurance. But if the corrugated board weight was never sufficient to begin with, or the stacking method was wrong, that’s a factory packaging problem. The way to tell them apart is your pre-shipment inspection records plus the packaging specification.
Step 3: Build a complete evidence chain
A claim that holds up typically requires these documents:
- Contract, specification, and sealed samples — the original basis of the agreed standard
- Third-party pre-shipment inspection report — the most persuasive single document (more on this below)
- Bill of lading, packing list, and commercial invoice — quantity and shipping records
- Port unpacking photos / videos — the current condition of the goods
- Damage report / exception receipt (for transit damage)
- Cargo insurance policy (if insured)
- Communication records with the supplier — especially on quality requirements and approval of the confirmed sample
Step 4: Choose your claim path
Move from fastest to slowest, from softest to hardest:
- Negotiate directly with the supplier: rework, replacement, refund, credit against the next order, or compensation — the lowest-cost and fastest route. Most disputes end here.
- File an insurance claim: for transit damage with cargo insurance, claim against the insurer using your damage records.
- Claim against the carrier: for loss, damage, or short delivery in transit, assert your rights under the bill of lading against the shipping line or forwarder.
- Escalate to the platform: for orders placed through cross-border e-commerce or B2B platforms, open a platform dispute promptly and upload your evidence.
- Arbitration / litigation: if negotiation fails, follow the dispute resolution clause in your contract (seat of arbitration, governing law).
The value of a third-party inspection report here is seriously underrated:
- Inspected and passed before shipment → strong proof that the problem did not originate at the factory gate. That redirects the focus to transport, handling, or the buyer’s own warehousing — giving you a firmer case against the carrier and insurer, and helping the factory clarify its position.
- Inspected and failed, yet released by the buyer → direct proof that the goods were non-compliant when they left the factory — the strongest written evidence for a claim against the supplier.
- Never inspected at all → you’re left with only a fuzzy comparison of “port condition vs. contract terms.” The factory can muddy the water with “it was fine when it left our hands — transport damaged it,” and your burden of proof becomes very heavy. This is the hidden cost of skipping inspection.
Part 2: Why Do Problems Surface Only at the Port?
Most problems discovered only at the port are not deliberate concealment by the factory — it’s that a quality control checkpoint was skipped somewhere along the way:
- Only the approved sample was checked, with no verification that mass production actually matched it (the root cause of “goods not as agreed”)
- No in-production inspection, so the defect rate was only discovered after everything was finished and loaded
- No pre-shipment inspection (PSI), or an inspection that wasn’t judged against AQL
- No container loading supervision for high-value or short-shipment-prone cargo
Once the goods are on board, there is essentially no room left to fix anything — that’s what makes “discovered at port” so expensive. Quality costing has a well-known rule: the later a defect is found, the larger the cost escalates — by orders of magnitude.
| Stage Where the Defect Is Found | Approximate Cost Magnitude | Rework Possible? | Scope of Consequences |
|---|---|---|---|
| Sampling / incoming materials | 1 | Correctable on site | Sample-level, localized |
| During production (DPI) | ~10 | Rework remaining production | Within the production line |
| Pre-shipment (PSI) | ~tens | Sorting / rework / rescheduling before loading | Controllable before shipment |
| Loading / after arrival at port | ~100+ | Virtually impossible | Return freight, air-freight replacement, platform penalties, lost customers |
The industry often says: “Spend 1onprevention,save10 on correction, avoid $100 on failure.” Effort invested in the first three checkpoints pays off far more than post-arrival damage control.
Part 3: Prevention — Move Inspection Before the Goods Are Loaded
Prevention isn’t simply “inspect more often.” It means placing the right inspection action at every risk point in the order.
1. Four lines of defense, staged across the order lifecycle
| Checkpoint | When | What It Addresses | Best Suited For |
|---|---|---|---|
| First Article Inspection (FAI) | 10–20% production complete | Whether materials, workmanship, and style match the approved sample; prevents material substitution and process drift | New products, customized items, orders with strict sample requirements |
| During Production Inspection (DPI) | 50–60% complete | Batch consistency and semi-finished defect rate — time left to rework | Large-volume orders, long production cycles |
| Pre-Shipment Inspection (PSI) | 80–100% complete, before loading | Full check of appearance, function, quantity, packaging, and marks, plus AQL judgment | The standard for virtually every export order |
| Container Loading Supervision (CLS) | On loading day | Quantity count, seal verification; prevents short shipment, wrong loading, and moisture | High-value, short-shipment-prone, LCL, and orders with a history of disputes |
The most cost-effective combination is PSI + loading supervision: the pre-shipment inspection confirms quality compliance, while supervision protects quantity and the sealed container. Both can be handled by the same inspector, which keeps costs down. For electrical products and items with safety certification requirements, make sure safety tests are actually performed on site during the PSI stage.
2. Agree the standards in advance
A large share of port disputes stem from the two parties disagreeing on what “acceptable” even means. Prevention starts with spelling it out in the contract or PO:
- Which sampling standard to use (e.g., AQL General Inspection Level II / ISO 2859-1)
- The acceptance and rejection numbers for Critical / Major / Minor defect classes
- Acceptance criteria for key functions, safety items, packaging, and marks
- Which sealed sample (the approved sample) prevails
When the standard is on paper, inspection has an objective basis — and claims have a common language.
3. Manage the supplier at the source
If a supplier’s quality system is unstable, every inspection after that is just firefighting. For long-term sourcing or large orders, consider a factory audit before you commit — assess production capacity, quality management systems, and delivery capability, and filter out high-risk factories at the source.
4. Use an independent third party — don’t rely only on factory self-inspection
Factory self-inspection carries an inherent conflict of interest: the factory is both player and referee. An independent third-party inspector stands on the buyer’s side, checks conformity against the contract, specification, and sealed samples, and issues a report that carries far more weight — both in neutrality and in legal terms. For a closer comparison, see Third-Party Inspection vs. Factory Self-Inspection.
To sum up the prevention logic: the approved sample sets the standard → FAI prevents deviation → DPI controls consistency → PSI confirms compliance → loading supervision protects quantity. Get these five actions right, and “discovered at port” goes from a probability to a rare event.

Part 4: FAQ
Q1: If a quality problem is only discovered when the goods reach the port, can I still claim against the factory?
Yes, but it depends on your evidence. If you kept the contract, specification, and sealed samples — especially a pre-shipment inspection report — your claim stands on solid ground. If you never inspected and only have photos of the condition at the port, the factory can easily argue “shipped in good condition, damaged in transit,” and you’re left in a weak position.
Q2: How do I tell transit damage apart from a quality defect?
Look at the cause of the damage and whether the packaging was compliant. Damage caused by the vessel or by handling in transit → claim against the carrier and your cargo insurance. Damage from insufficient carton board weight or improper stacking → a factory packaging problem. You’ll need the pre-shipment packaging inspection records together with the port damage records to prove it either way.
Q3: Is inspection worth it for small, low-value orders?
Use risk-based grading. For low-value general goods, loading supervision alone may be enough to protect quantity. For electrical products, items with safety certification requirements, or goods subject to strict platform rules (e.g., Amazon inbound shipments), run a PSI regardless of order value — a single rejected inbound delivery usually costs far more than the inspection fee.
Q4: How much does inspection cost, and how fast are reports issued?
Third-party inspection is billed per man-day. Inspector Online’s standard inspection starts at USD 103 per man-day. The typical rhythm: schedule on the day you order, the inspector visits the factory the next day, and you get a report with photos and AQL judgment in as little as 4 hours after the inspection — as fast as 2 calendar days end to end.
Once your goods are in transit, the last thing you want is “found at port.” Inspector Online’s 3,000+ inspectors cover major manufacturing hubs including Guangzhou, Dongguan, and Yiwu — responding within 30 minutes, verifying against your order and sealed samples on site, and delivering inspection reports in as little as 4 hours. Quality risk is stopped before loading, and the claim evidence stays in your hands.